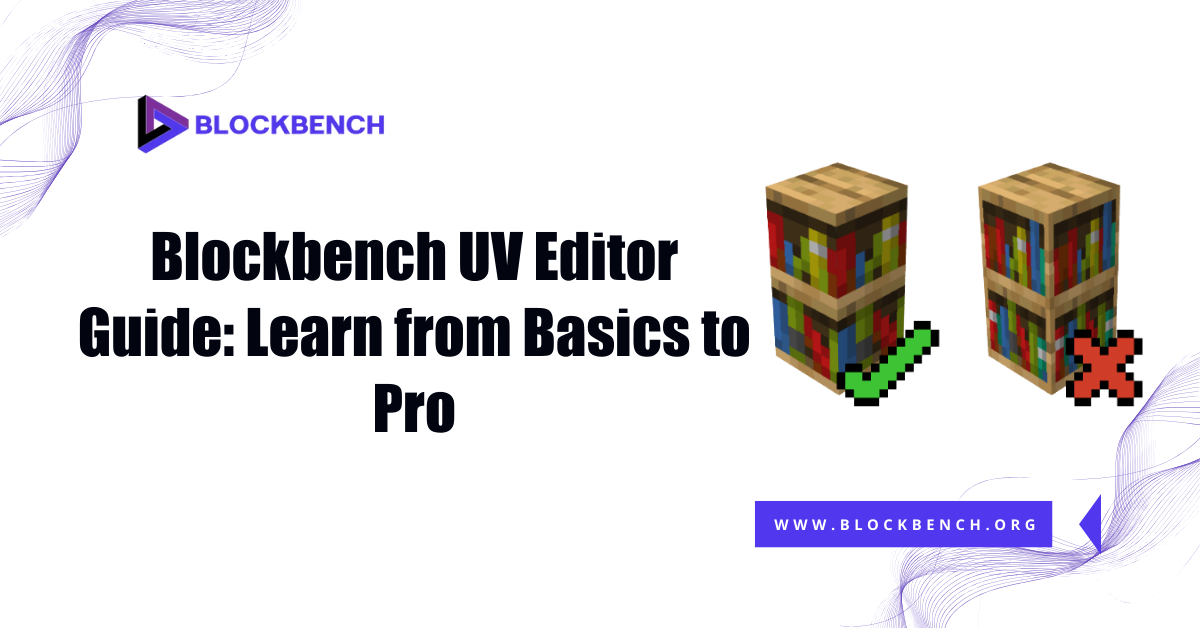
Introduction
If you’re diving into 3D modeling for Minecraft or custom voxel-based projects, understanding the Blockbench UV Editor is a crucial step toward creating high-quality game-ready textures. UV mapping determines how 2D textures wrap around your 3D model and without clean UVs, even the best textures can appear stretched, misaligned or broken.
The Blockbench UV Editor provides powerful tools for both beginners and advanced users enabling easier control over how textures are placed, adjusted, and optimized across your model’s surface.
Brief Overview of Blockbench UV Mapping
Blockbench UV mapping is the process of projecting a 2D texture onto a 3D model inside the Blockbench workspace. This mapping determines how textures align with the model’s surfaces. A well-organized UV layout ensures that textures appear sharp, accurate and distortion-free. In Blockbench UV mapping can be done manually or automatically giving creators flexibility to match both simple and complex designs.
What Is the UV Editor in Blockbench?
The UV Editor in Blockbench is a specialized tool designed for managing and editing the UV layout of 3D models. It allows users to unwrap their models into 2D representations making it easier to apply and align textures precisely. This editor is a core part of Blockbench UV mapping enabling creators to control how textures wrap around complex shapes.
The UV Editor in Blockbench is a dedicated workspace where you can view and manipulate the way textures are applied to your model’s surfaces. It allows you to control the mapping between your 3D geometry and the 2D texture file. The purpose of the UV Editor is to give you complete freedom in how textures are aligned, scaled and adjusted making it a vital tool for custom model creation.
How It Fits Into the 3D Modeling Workflow
In the 3D modeling workflow, UV mapping is the bridge between modeling and texturing.
Once your model’s geometry is complete, you use the UV Editor to unwrap and arrange the model’s faces onto a flat 2D surface, which can then be painted or textured. In Blockbench this step comes after building the model and before final texturing or animation. It ensures that textures display cleanly and accurately follow the shape of the model.
Why UV Mapping Matters for Textures
Without proper UV mapping, your textures may appear distorted, misaligned, or blurry. Good UVs allow for high-resolution, seamless textures, especially on curved or detailed surfaces. In Blockbench UV mapping, utilizing tools like Box UV Per-Face UV or Auto UV strategically can significantly enhance visual quality and texture clarity particularly for Minecraft models or voxel-based assets.
Getting Started with the Blockbench UV Editor
Getting started with the Blockbench UV Editor is straightforward even for beginners. The interface provides an intuitive workspace where you can view and manipulate the UV layout of your model in real-time. Familiarizing yourself with the toolbar, navigation controls and UV island selection tools is crucial for effectively managing your Blockbench UV mapping workflow.
Navigating the UV Interface
To open the UV Editor in Blockbench, switch to the Paint tab and click the UV button at the bottom. The interface displays the 2D texture on one side and the UV map of your model’s faces on the other. From here, you can select, move, scale, or rotate UV islands to match your desired texture layout.
Understanding the Toolbar and Layout
The UV Editor toolbar includes tools for selection, snapping, auto-unwrapping, seam marking, and more. You can also toggle the display of texture overlays, grids, and UV seams for better control.These tools are essential for detailed texture placement, especially when switching between Blockbench Auto UV and manual editing.
Setting Up Your Model for UV Mapping
Before unwrapping, ensure your model is fully built and logically grouped. Clean geometry, proper pivot points, and logical face grouping help ensure cleaner UV layouts. You may also want to assign a base texture or color map before entering the UV Editor, so you can instantly see how the UVs affect the applied texture.
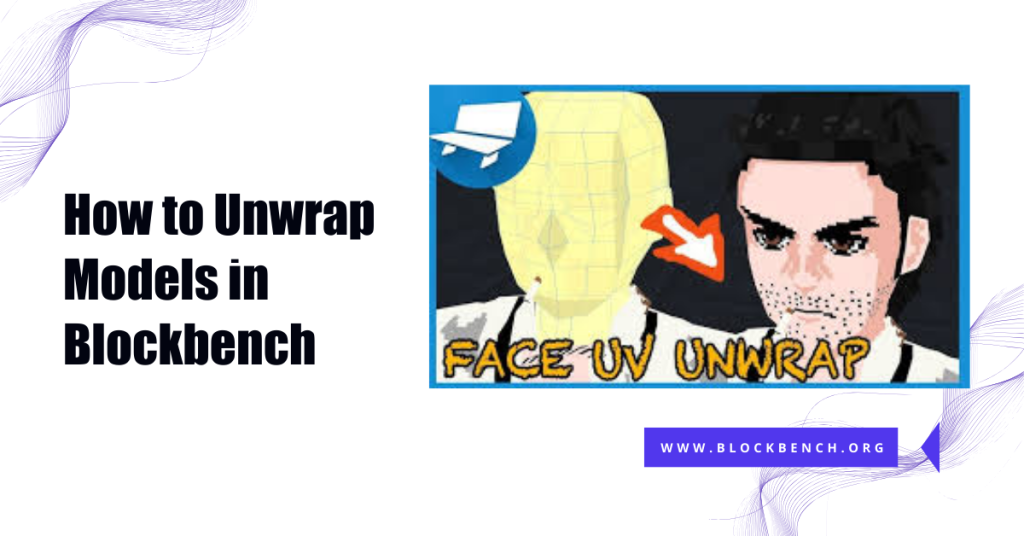
How to Unwrap Models in Blockbench
Unwrapping models in Blockbench involves flattening the 3D surfaces into 2D UV maps for precise texturing. You can choose between manual UV unwrapping for complete control or use Blockbench Auto UV for a quick, automatic layout. Manual unwrapping allows you to place seams and adjust UV islands precisely making it ideal for detailed or complex models. In contrast, Auto UV works well for simpler shapes or faster workflows.
Manual vs Auto UV Unwrapping Explained
In Blockbench UV mapping, you have two main unwrapping options: manual and automatic. Manual unwrapping provides complete control, enabling you to place seams and adjust UVs for pixel-perfect accuracy. This is ideal for complex or stylized textures. Auto UV on the other hand, automatically generates UV islands based on the shape of your model. It’s a fast option for repetitive or straightforward geometry but may require cleanup for professional results.
Step-by-Step Guide to Unwrapping a Model
- Open your model and go to the UV Editor
- Select faces or groups of faces
- Use the Auto UV feature for quick unwrap, or manually place seams with the Seam Tool
- Adjust the UV islands for scale and alignment
- Use the grid and snapping tools for precision
This workflow ensures clean, scalable texture mapping across any model type.
Choosing Between Box UV and Per-Face UV
Box UV applies the same texture projection across multiple faces, making it perfect for blocky or symmetrical shapes, such as Minecraft blocks or characters. It’s fast and ideal for simple designs. Per-Face UV treats each face individually giving you ultimate control over texture placement. This method is better suited for detailed irregular models but it requires more time to manage.
Working with UV Islands and Seams
In Blockbench UV mapping UV islands are groups of connected faces that unfold together in the UV Editor. Understanding how to organize these islands is key to creating a clean and efficient texture layout. The Seam Tool helps define edges where the model breaks to form these islands allowing you to control how textures wrap around complex shapes.
What Are UV Islands and How Do They Work
UV islands are clusters of connected faces that are unwrapped and placed together on a 2D texture. In Blockbench UV, each UV island represents a part of your 3D model such as an arm or a block side. These islands help separate parts of your model for individual texturing, making it easier to manage texture details and avoid stretching. Organizing UV islands clearly ensures better painting and editing in both Blockbench and external software.
Using the Seam Tool Effectively
The Seam Tool in Blockbench UV mapping allows you to mark edges where your model will split during unwrapping. These seams define the boundaries of UV islands and help control how the texture is applied to your model. For optimal results, place seams along natural edges or in hidden areas of your mesh to minimize visible texture breaks. Using this tool properly improves unwrap quality, especially when combined with Blockbench Auto UV or manual editing.
Aligning and Organizing UV Islands for Clean Layout
Clean UV layouts are critical for precise texture painting. In the Blockbench UV Editor, you can move, rotate, and scale UV islands to align them neatly on the texture map. Use grid snapping and alignment tools to ensure uniformity between parts of your model. Well-organized islands minimize wasted texture space and facilitate easier editing in external tools.
Texture Painting and Mapping Accuracy
Using the Blockbench UV Editor ensures that your textures align perfectly with the surfaces of your 3D model preventing unwanted stretching or distortion. Accurate UV mapping allows texture artists to paint with confidence, knowing that designs will wrap seamlessly around complex shapes. Aligning textures to UV islands is crucial for maintaining sharp details and consistent patterns, especially on characters or detailed props.
Applying Textures Using the UV Editor
Once your UVs are unwrapped, the Blockbench UV Editor becomes the central tool for texture application. Here, you can paint directly on the 3D model or adjust the UV islands to fit pre-made textures. This editor enables pixel-perfect alignment, which is essential for stylized or patterned textures. Whether you import textures or use Blockbench’s built-in tools, a good UV map ensures they display correctly on your model.
Aligning Textures with UV Islands
Accurate alignment between textures and UV islands prevents visual glitches, such as lines or breaks. You can drag UV islands to match the texture artwork exactly ensuring each face displays the intended design. In Blockbench UV mapping, using guides and snapping tools helps maintain this precision. This process is critical when painting symmetrical designs or working with characters, as misaligned UVs will result in distorted visuals.
Avoiding Stretching and Distortion
Texture stretching occurs when UV islands don’t match the proportions of your model’s geometry. This can make textures appear warped or blurry. To prevent this, always check your UV islands in the Blockbench UV Editor and adjust their shape and size to accurately reflect the 3D surface. Using a checker pattern overlay can help you easily spot stretching. Clean unwrapping with good seam placement and proportional UV scaling is the best way to eliminate distortion during Blockbench UV workflows.
Advanced UV Editing Tools in Blockbench
The Blockbench UV Editor features powerful tools for users seeking greater precision in their UV mapping workflow. Features like grid snapping and numerical input allow you to align UV islands perfectly, ensuring textures stay clean and consistent across faces. These tools are helpful for models that require symmetrical or repeatable texture patterns.
Grid Snapping and Precision Alignment
For clean professional UV maps use grid snapping in the Blockbench UV Editor to align UV islands with pixel-perfect precision. This is especially useful when texturing Minecraft models or any voxel-based asset where alignment directly affects how textures repeat or connect. Precision alignment minimizes errors in texture seams and ensures consistent detail levels throughout your model.
Stitching and Separating UV Islands
Blockbench also allows you to stitch together or separate UV islands for advanced control over texture flow. Stitching merges adjacent UV edges into a single island, which can improve texture continuity on connected faces. Separating, on the other hand, is helpful for isolating specific parts of a model that need different textures or fine-tuning. These functions are especially valuable when refining a Blockbench Auto UV layout or converting from Box UV to a more detailed unwrap.
Using Overlays and Checker Patterns for Debugging
One of the best ways to ensure UV accuracy is by enabling overlays in the Blockbench UV Editor. Checker patterns and grid overlays highlight texture stretching, misalignments, and overlapping UVs. This visual feedback is crucial during the texturing phase allowing you to fix issues before exporting. These tools help validate your Blockbench UV mapping process and are a great habit to include in your workflow. Debugging UVs early saves time and improves your model’s final appearance.
Exporting and Testing Your UV Map
Once your UV layout is finalized in the Blockbench UV Editor, you can export it as an image file typically PNG to use in external software such as Photoshop, GIMP, or Krita. This export provides a visual map of your model’s UVs allowing for precise texture painting and design alignment. Before exporting, ensure your UV islands are neatly arranged and free of overlaps to avoid issues during texturing.
Exporting UV Layout Images for External Texture Painting
Once your UV map is complete, you can export it as a PNG image to use in programs like Photoshop or GIMP. This layout serves as a template for applying high-quality textures directly to the model’s surface. Cleanly unwrapped UV islands from Blockbench UV mapping will make this template easier to work with especially if you’ve used the Seam Tool effectively. Always double-check your exported layout to ensure all critical faces are visible and correctly proportioned.
Checking UV Quality in Blockbench’s Preview
Use Blockbench’s built-in 3D preview to test how your UVs look in real time. Apply placeholder textures or patterns to see if any parts appear stretched or misaligned. This step is crucial in identifying subtle issues before proceeding to final texturing.
Previewing your model also helps confirm that your Blockbench Auto UV or manual unwrapping workflow has delivered the expected result. Take time to rotate the model and inspect it from all angles.
Testing In-Game or In-Engine for Final Polish
Finally test your model inside the intended game engine, whether it’s Minecraft, Bedrock Edition or another environment. This ensures that lighting resolution and animations don’t reveal hidden UV problems. Inconsistent UVs or poor seam placement can become more visible once lighting or shading is applied. Reviewing your model outside of Blockbench UV Editor gives you the confidence that your asset will perform well under real-world conditions.
Conclusion
Mastering the Blockbench UV Editor is crucial for anyone seeking to create clean, professional-looking textures in 3D models, particularly for Minecraft and voxel-style designs. From understanding the basics of Blockbench UV mapping to utilizing advanced tools like the Seam Tool, UV island alignment, and texture exporting, the UV Editor empowers you with complete control over your textures.
FAQs
What is the purpose of the UV Editor in Blockbench?
The Blockbench UV Editor allows you to unwrap 3D models and precisely align textures on them. It’s essential for clean, accurate UV mapping and texture placement.
How do I choose between Box UV and Per-Face UV?
Use Box UV for simple, blocky models such as Minecraft assets, and Per-Face UV for detailed or complex shapes that require custom texturing control.
Can I fix overlapping UVs in the UV Editor?
Yes, the Blockbench UV Editor allows you to manually move, scale, and separate UV islands to resolve overlaps and enhance texture clarity.
Is Auto UV reliable for detailed models?
Blockbench Auto UV is fast for basic layouts, but detailed models often require manual edits for cleaner results and better texture precision.
How do I export my UV map from Blockbench?
Go to the UV Editor, click the export option, and save your UV layout as an image for external painting in apps like Photoshop or GIMP.
Can I use Photoshop with my Blockbench UV layout?
Absolutely! Export your Blockbench UV as a PNG and use Photoshop to paint directly on the texture map for accurate, high-resolution designs.
Latest post:

Harold F. Rodriguez
Harold F. Rodriguez, the visionary mind behind blockbench.org, is a passionate and innovative individual dedicated to the world of technology. With a profound understanding of software development and a commitment to excellence, Harold has carved his niche in the digital realm. His journey is marked by a relentless pursuit of creating user-friendly solutions that redefine the landscape of online platforms. As the driving force behind blockbench.org, Harold continues to inspire and contribute to the ever-evolving tech community, leaving an indelible mark on the intersection of creativity and technology.